


Toeside
-
Posts
2,381 -
Joined
-
Last visited
-
Days Won
2
Content Type
Profiles
Forums
Events
Store
Posts posted by Toeside
-
-
No problem @zcacogp I am now in the part of my life where I have forgotten more than I have learned in life ................ 😂
-
 1
1
-
-
They certainly do @zcacogp ...................... due to the fact there wasn't a model specific (I could find) on the net I offered this video help as an alternative.
Instead of having to remove the drive shaft (which act as the stub axle through the hub) you will have a bare stub/hub arrangement which is much simpler arrangment.
I thought you seem to be an expert on wheel bearing matters .................... 😉
-
From memory this set of videos will take you through a similar experience on the 987. Probably a few minor differences
-
Please let it stop!
-
Good job! It is a real problem on the 87's
-
Let us know how you get on in case another one of us has the same issue without the extended warranty! 😲😱
-
 1
1
-
-
The reliability of these mounts isn't great Just turned down extending my warranty so fingers crossed. Hope you get things sorted. What about fitting non dynamic mounts and deleting the input? Just throwing up ideas an Indie might know some pragmatic alternative options?
-
-
What about using an indie?
-
No worries and no hurry. Have great holiday
-
1 hour ago, Roch1969 said:
I’ll take some tomorrow as it’s dark outside now. I’m afraid I’ve no idea how to do the front end as I gave it to a body shop. I bought a bare used bumper and then bought all the trims, DRL’s, DRL frames etc from the OPC. Be aware though that all of those extra pieces cost me around £800 (the bumper was cheap at £325). With colour coding/fitting it cost around £2k but I should get back around £400 on my old bumper.
Thanks a bit of investment ..... but I bet it looks good!
-
1 hour ago, Roch1969 said:
Yes the existing surround does fit. I only purchased the two diffusers and used the original surround. I had my diffs painted gloss black and wish I would have done the surround as well but it still looks good as is. I also changed my front bumper set up to the GTS as I think it looks so much better.
@Roch1969 Any pics of the GTS front end and a "How too"?
-
Might help things move but not necessary. Main thing is keep things warm and if your getting frustrated on the first side go and have coffee and cool off and then go back and have another try. It is a straight forward job once you figure out the clips.
-
1
-
-
The pics have re-appeared 😲
-
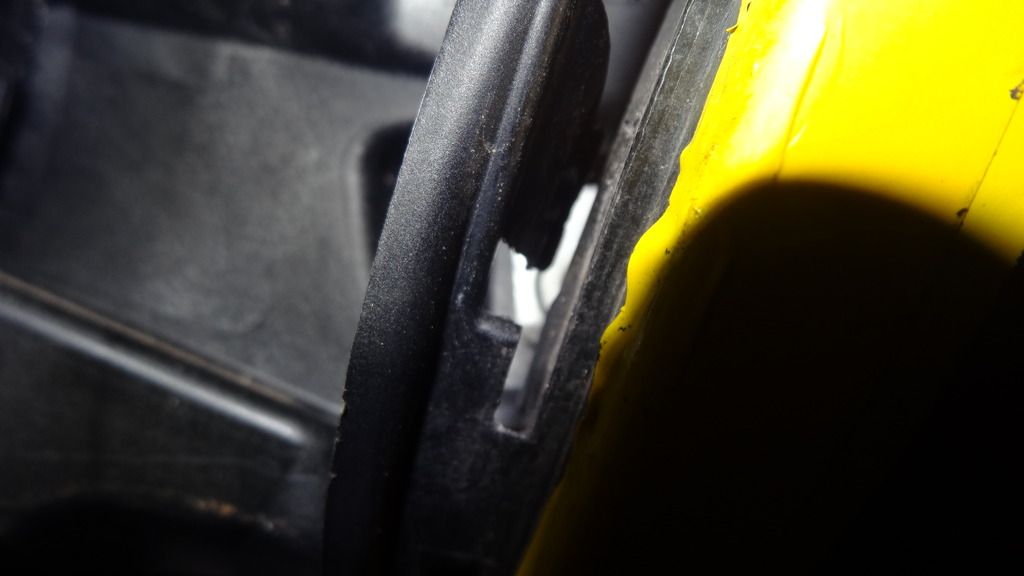
I can confirm. The clip arrangement is a right royal PITA around the exhaust.
I did post some pics but they were lost when the photo sharing app stopped allowing free stuff
 I think I might still have them some where. Another tip especially at this time of year is to keep all the plastic warm. It helps prevent snapping clips and gives you a little more margin to flex stuff without damage.
Good luck!
-
1
-
-
3 hours ago, mneil said:
A great mod. Found that I had to ditch the jig saw in favour of my dremel to avoid stress cracks but that was probably the blade. Great end result, thanks for sharing.
Use a metal cutting blade or very fine cut and tape the area to be cut. Shouldn't be a problem.
-
Tidy job. Well done Eddie.
Looks very OE!
-
Yes if you look at the up close shots I have tried to indicate how the clips interact.
Have you got some trim tools flat pry types available? Use tape to protect paint surfaces
")
-
Its a great low budget OP mod. Two methods for fitting now documented. Give me a PM if you get to carry it out on the car although I have listed all the learning I discovered. Figuring out the clips (pics posted on the thread) and having some trim tools are key getting the job done.
-
2
-
-
On 1/14/2017 at 2:01 PM, T24RES said:
Much improved, imo these tidy the rear end very nicely. And only a smidge more than a set of grilles ?
Thanks to you and @topradio for the help on my project.
-
1
-
-
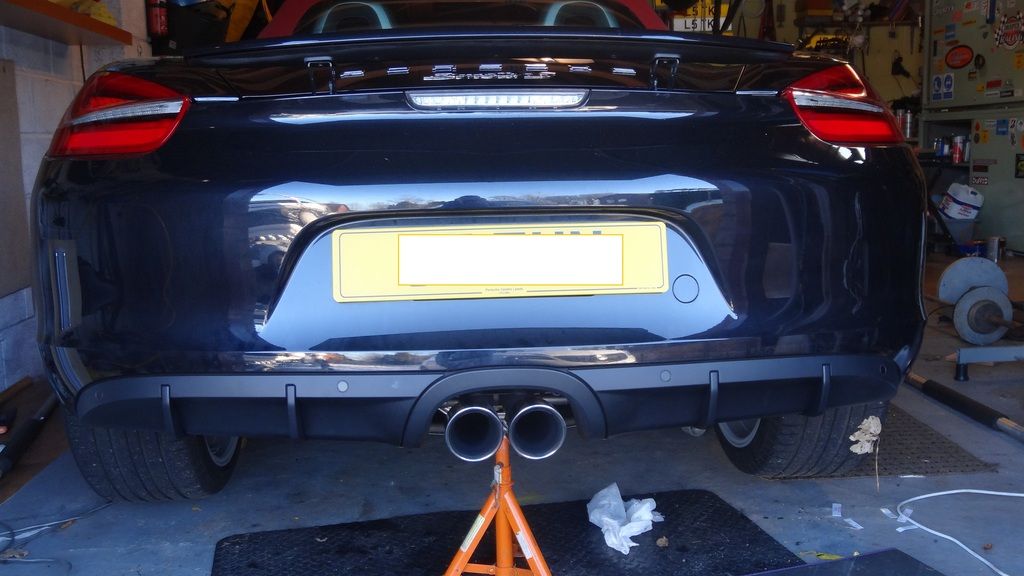
Before
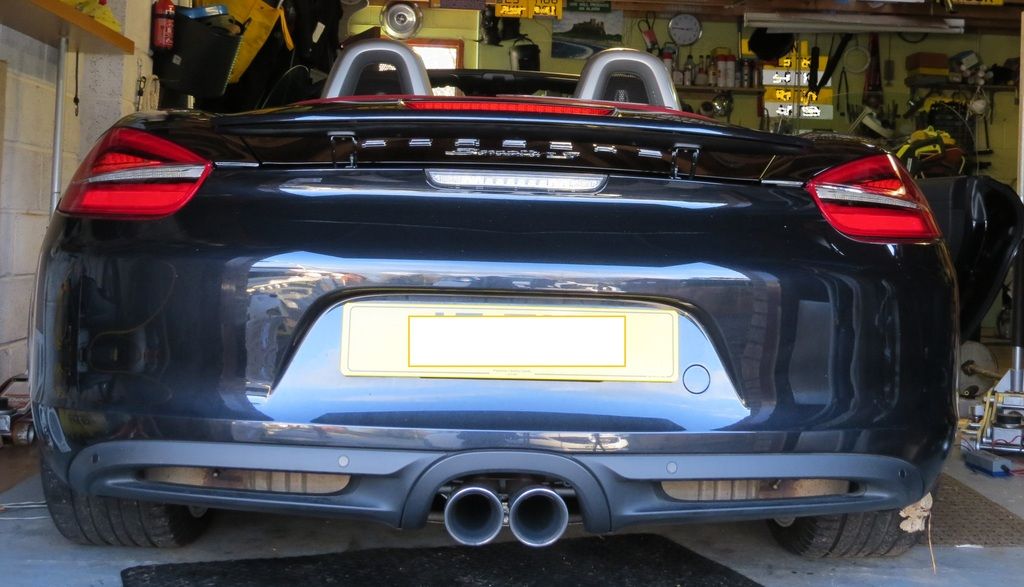
After ..........much tidier I think
-
Just had to unclip the pdc sensors not disconnect. Very simple thankfully ................easiest part of the job
 !
!
-
Front view of the centre middle clip arrangement on the exhaust trim
-
@T24RES It helped me with access to the centre area. I had loosened all that off a few weeks ago as I found that on the 987 they were well stuck together and it took me ages to release and I don't want the same to happen on the 981.
I would start with removing both diffusers at each wheel and working in to the exhaust. The second side was easier with the centre plastic support loose


 !
!

Small hose on back of intake
in 987
Posted
Have a look at this link. Its for the 986 but I believe its the same arrangement for 987 Its seems to to go to the small block in the centre of the picture to the electric change over valve
http://986forum.com/forums/boxster-general-discussions/66666-vacuum-diagram.html