


timbobalobox
-
Posts
193 -
Joined
-
Last visited
-
Days Won
1
Content Type
Profiles
Forums
Events
Store
Posts posted by timbobalobox
-
-
Project 387
in 987
Spent a bit of time the last couple of evenings getting the passenger door back together (only to find the actuator was no longer opening the door, so had to take it all apart again 🤬)
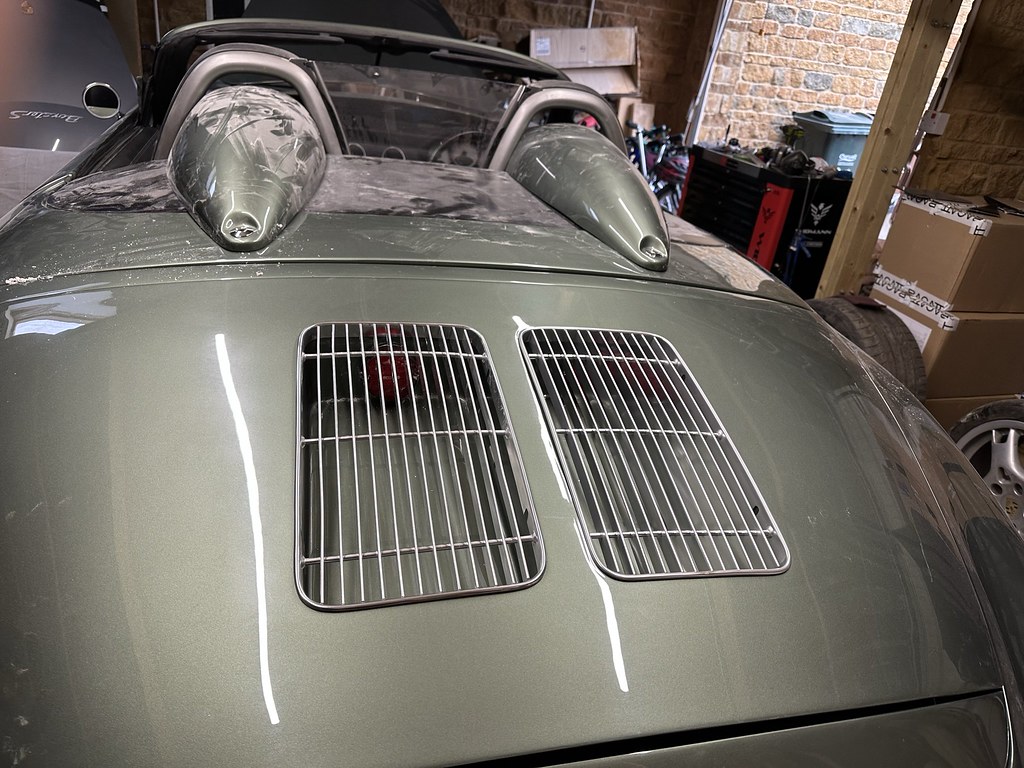
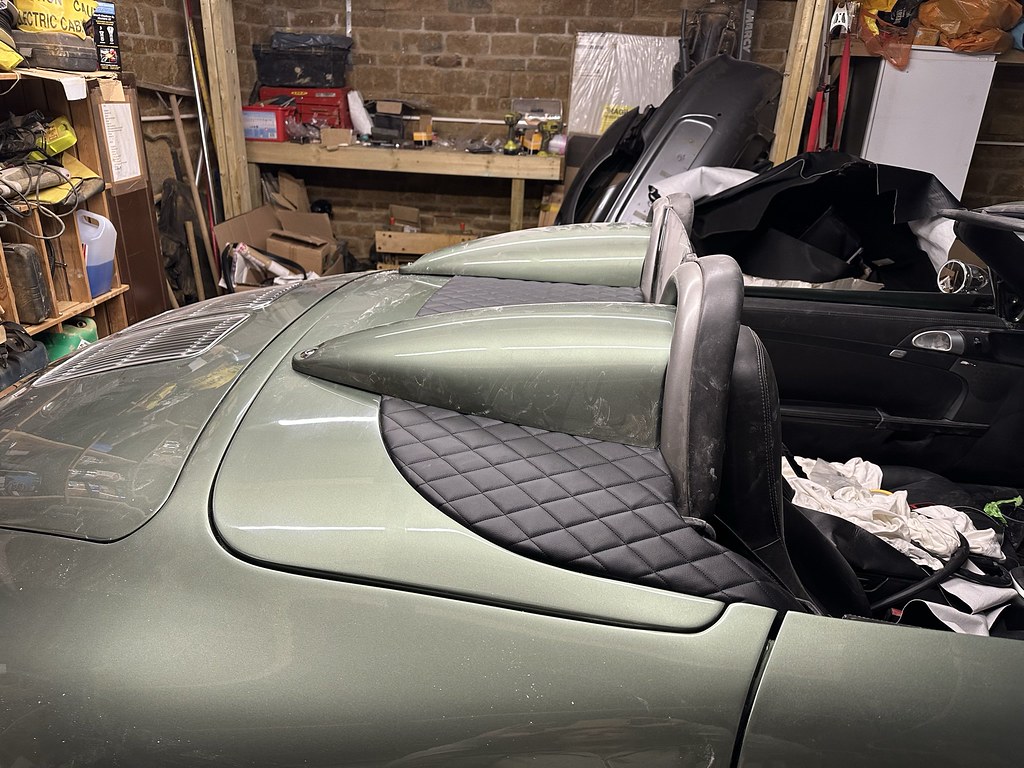
On the plus side managed to get the rear tonneau cover and humps on with lots of cutting/sanding to get right;
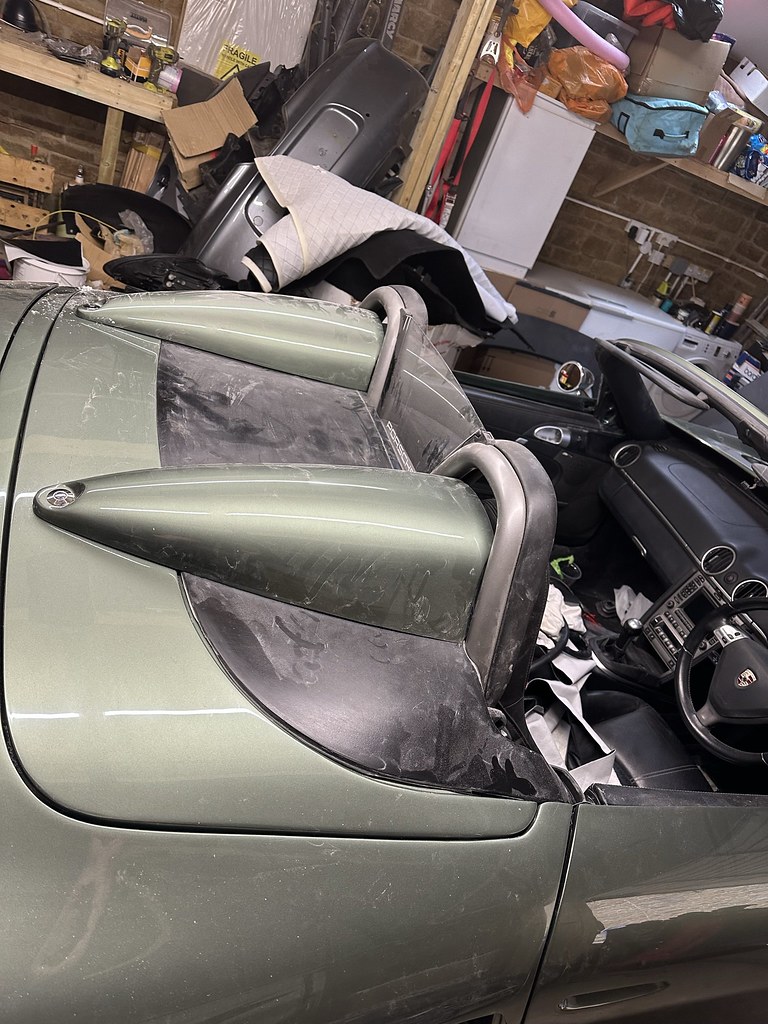
With the vents in too (in hindsight wondering if I should have painted the inside of the wells black so it doesn't look like what it is, i.e. fake!?)
Then got to trimming with scissors and copious amounts of double sided tape;
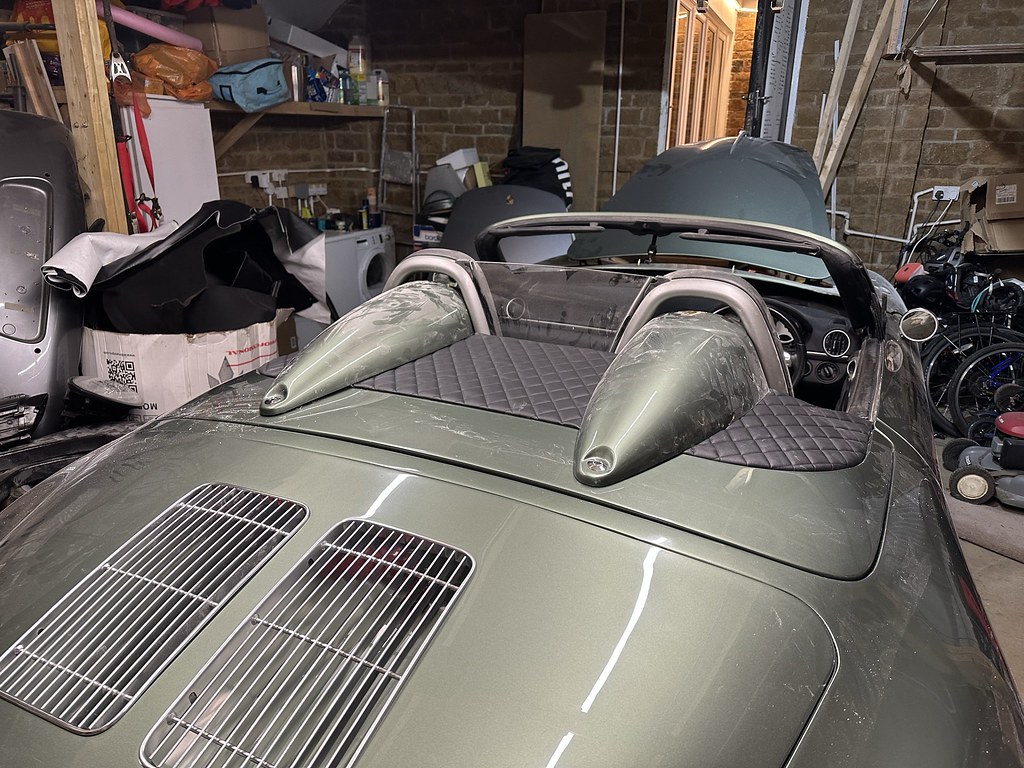
Ordered the tyres which I can hopefully collect this week/early next, then I can almost, almost, see the finish line!
-
 1
1
-
-
Project 387
in 987
1 hour ago, skoosh1970 said:...on the decal dilemma... it's worth noting that the white part is the backing for the red sticker part so it won't look as large as it appears so probably won't be too invasive ..?
I'd be tempted to purchase a smaller one and place it under the side repeater or on the bottom front corner of the doors , same place Porsche offer the model number sticker perhaps..?
Just my 2p worth.
You're right - I had crudely cut it out, so there's a good 5-10mm to come off.
I might see about getting a smaller one as the printed ones aren't expensive.
51 minutes ago, MickH said:On the Pegasus discussion, I'm not a fan either, but if you are going down that route have you considered a gold one to match the badges?
I think a proper one could look quite smart - ideally I wanted to get all these little bits done all together, so I can it's 'it's finished'! but in the real world these touches will take a bit longer
-
Project 387
in 987
1 hour ago, JonSta said:Dunno - lots of them are.....
Chesil do the conversions or sell you a kit for a 356 that uses a original Beetle as the donor car (I think the floorplans are the same, or very close)
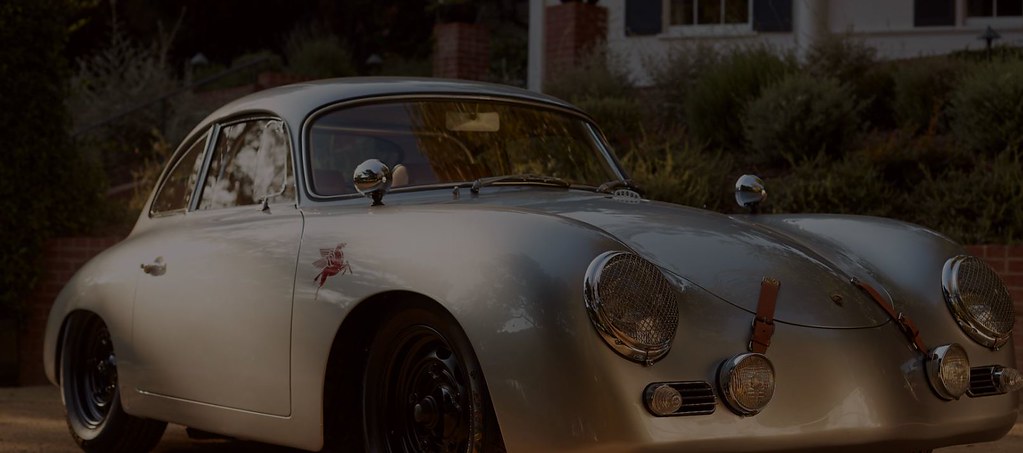
I was thinking about one for a while as I love the classic look of the 356 (and can't afford a real one
 ), but it'd always be based on 50s/60s technology (as is the 356 to be fair). When I saw the Iconic kit I figured it was a good compromise, whilst still keeping some performance!
-
Project 387
in 987
44 minutes ago, Terryg said:Whilst I am being offensive, I get why you think one exhaust would be cool but as this is a "re-imagined" car on modern mechanicals, personally I think two pipes are more appropriate.
Great work as always.
It's really hard to see what I want at the moment with it up on stands and not being on the ground with the wheels - the one that grabbed my eye on YouTube originally had these carbon Akrapovic tips on, which whilst the shape is good I'm not sure I'd have the same name/finish so visible

-
Project 387
in 987
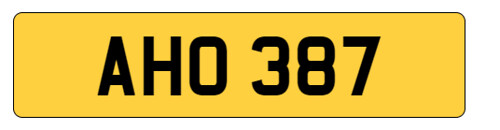
11 hours ago, Wish said:Can’t you get an older type reg number ie 3x3
Just had a look - this one is up for £800!
-
 1
1
-
-
Project 387
in 987
12 hours ago, entdgc said:Controversial but do you REALLY need the Pegasus? Loving the rest of the work.
Not at all - I've been in two minds about it so a while, particularly on the green paintwork. On the right car I think it can look good;
They weren't expensive (~£7.50!) so was happy to buy and try. Easier to leave them off than bu55er the paint!
-
Project 387
in 987
1 hour ago, Patt said:try using steam for that crease - either clothes iron or wall paper stripper, or hold above kettle spout (wear suitable protection)
But you may need to re-tension after the steam.
Will give it a go, cheers 👍
-
Project 387
in 987
1 hour ago, Menoporsche said:I agree that out of those you've illustrated, the hump is the best place for the Pegasus. Remember that forward of the rear wheel arch is the location that Porsche fit PPF to protect against chips, so it would get hit. Too busy in the front wing.
Good point - hadn't considered it'd get peppered there!
1 hour ago, Menoporsche said:I guess you can't put Speedster in line with the repeater? It looks long and would perhaps hit the curve of the top of the wheel arch.
It is a bit long really to go there unfortunately, it was always a balance over where to put everything so it looks 'right'
-
Project 387
in 987
Monday morning update...
I couldn't get a decent run at it this weekend due to family commitments, but had an hour here and there so managed to get some bits done.
Little things like the rear badge and messing around with the exhaust options - it needs to be extended as the rear body is longer. I quite like the simple single pipe, but I think I might wait until it's back on it's wheels so I can see it properly from the back before I commit. Perspective is strange here as it's level but looks like it points down in the picture 🤨 Just noticed you can see my rough workings out for getting it made!

Also managed to do the other headlight bracket - lug from the front (also rubber gasket on)

And from the back (awkward picture!). It's not neatest as it was a complete pain getting it to follow the body, whilst retaining enough flat on flat for strength. Thankfully it doesn't seem like it's going anywhere!

Played around a bit with the side 'Speedster' badges and pegasus options;
With both, in the traditional place (a bit crowded as we have the side repeaters)

Without;

Then on the rear;


Or on the hump (favourite so far I think)

Set about trimming the tonneau covers and mounted the quick release pop-catch for the hump - it needs a touch more so it pulls flat. Any gaps should also be covered by the leather

Also put the front valance on so I can work out where best to put the front Porsche badge - I was waiting to get some of the electrics out of the way first as access isn't the best with it on. Had to put the plate on too! I think the perspective is out here as it's dead level with the gap in the flesh, weird.

Had a bash at the battery cover, first time upholstering, so don't judge
Hole is for the washer fluid filler

Tape on

And stuck

Roughly in place - I've applied a bit of heat from a hairdryer and that crease is coming out. I'll see if it stretches out over the next day or so too. Needs a smidge of work around the corners then it should drop in nicely. I should have a panel to cover the top hole as well, just need to find it in the pile of bits

Oh, and finally picked up the wheels too
") I'm half tempted to get the middle powder coated in gold to match the gold in the paint and badges, but it's going to a mission to match it! Just need to get some tyres and I'll put them on the car 👍
I'm half tempted to get the middle powder coated in gold to match the gold in the paint and badges, but it's going to a mission to match it! Just need to get some tyres and I'll put them on the car 👍

That's it for now, I'm hoping to get a couple of evenings this week on it so can make some progress. With the weather improving I'm desperate to get it done!
Have a good week 👍
-
5
-
-
Project 387
in 987
47 minutes ago, JonSta said:Do they not check the VIN?
For the MOT/daily driving I’ll keep the white/yellow plates on and use the classic silver/black for any off public highway drives/shows etc 👍🏼
-
1
-
-
Project 387
in 987
15 hours ago, Araf said:You only need a screwdriver, to swap the number plates.
")
I plan on carrying a stubby and spare set of plates in case I forget to change them over!
-
 1
1
-
-
Project 387
in 987
13 hours ago, Bike Loon said:I have a full set of Bose speakers for sale
Actually, looking at your pics...are you sure yours are Bose? You don't have the sub shelf
Appreciated! When I bought it, it was advertised as having Bose (originally one of my wish list, thinking it would be quite good) and has the stickers on the door.
Neither of which are guaranteed of course to be actually a Bose system! What other tell tale signs show it is Bose? I from what others have said I imagine this will affect what speakers I replace with
-
Project 387
in 987
12 hours ago, BBB said:Probably too late, but to address your OCD, these are centre wired.
https://www.ebay.co.uk/itm/Porsche-914-driving-lights-spot-lights-pair/284315916672
Thank you - I might change them over at some point 👍🏼
-
Project 387
in 987
5 minutes ago, Patt said:I found adding some sound deadening behind speakers and in sub enclosures hugely improved the sound of the 80's Bose system.
Thank you, I'll give that a go first - seems a good option prior to replacing lots of other bits (especially when the door cards/inners are off anyway)
-
Project 387
in 987
2 minutes ago, iborguk said:When you've stopped with the outside stick PCCM+ in it as well
I do need to change the speakers as I'm less than impressed with the Bose set-up - it sounds like the speakers have blown and there is so much distortion!
I have to try and stop the project creep however 🤣
-
Project 387
in 987
1 minute ago, Menoporsche said:Dropping bolts - as someone said on a hardtop spinlocks question, poke the bolt through a plastic bag, get the thread to bite, then rip off the bag.
That is genius! Definitely doing that next time 👍
2 minutes ago, Menoporsche said:Humps - I'm a heathen but can you run it for a month without the humps, see if you like it? I feel they are so much form over function...
Very much form over function
I'll see how the rest of things are going and fitting them in and around the other bits - it could make a difference to the look being back on it's wheels too
-
Project 387
in 987
Morning all,
Managed to dedicate a bit of time to it this weekend, lots of time consuming jobs that don't really look like much unfortunately!
A huge chunk of my time was taken up with working out how to fit the headlights as there was no mechanical fixing other than the bolt on the bottom. I plan to fix a captive nut there to hold the base (hole visible on the photo), but had to suss out the top. Various cardboard templates brought me to this with some galvanised plate I had leftover from another project;

I had planned to bond this to the underside of the shell once the middle was cut out, but after fabricating it realised it didn't actually solve the issue... <facepalm>
Looking online to see how the originals fitted, I needed to create a protruding lug at the top so bought some right-angled aluminum from Wickes and made a bracket to bond at the top - so far so good, but haven't been brave enough to take the light back off yet to check 🤣 I've only done one side so will get some photos of the other bracket when I get to it.
It wasn't without drama however... When trying to fit the headlight my hand slipped and knocked the vent pipe hard enough to make it weep <another facepalm> I haven't brought myself to look at it in detail yet, so stuck a bucket underneath and added something else to the to-do list!

Also fitted the filler lid and in doing so the small details of the kit are now showing up... i.e. the lugs don't fit from the new hinge (paint + tolerance/thickness of fibre glass vs steel) so needed to modify the hinge and holes to suit, then bonded it in. End result was acceptable

Also spent some time working on gapping the tonneau cover, which for the life of me can't get right! I've added a load of spacers underneath but it's still sitting low, so I think I might adjust the micro-switches as it sits perfectly if you stop before. You can just about see the little 'x' marked for the speedster hump - I can't do this until the tonneau is solved otherwise I risk it not fitting correctly, and there's very little tolerance if I want it tight.

Also spent an age gapping the boot/spoiler - frustratingly I don't think the painters had the spoiler in when they worked on the bootlid gaps, so it was a nightmare to get close. I'm still not happy so might have to take it off to do it again and shave some off then get it repainted.
On the plus side I got the lights working (side, indicators and brake), then couldn't resist getting the plate on too
Reverse, fog and number plate light aren't working for some reason so need to put a bit of time to working that out too.

Marked up and mounted the wing mirror - I had to order some convex glass as a replacement so they function a bit better! (and yes I did manage to draw on the bodywork with the sharpie <ANOTHERfacepalm>


Pleased with the end result though.

It didn't go completely smoothly - there was a small hole to fit the bolts through the door skin, where I managed to drop the bolts three times inside the door 🤣. Having put all of the door card back on the drivers side, it all needed to come off again to retrieve them! Turned out they were coming off anyway as the hinge restrictor had to go on. Unfortunately someone (not me this time!) had broken the electrical connector that plugs onto the door lock module, which meant I had to fashion a way to keep it in place - friction alone wouldn't work as they're weather sealed so it naturally wants to pop out again! Lost a couple of hours messing about with this.
Visibility is good though 👍

Spent a while mounting the front driving lights which needed a wire sleeve fashioning as the existing wiring wouldn't reach into the car - I extended them by soldering/heatshrinking them together for weather sealing. I can't make up my mind if I like the 'Outlaw' type sleeves - it doesn't help that the lights are the same so the wire comes out the same side, not sure if my OCD can cope
They're not lined up yet (they look even more on the p1ss in this image, but in real life they're not so bad)

Pretty much it for this weekend - lots of facepalm moments, lots of fiddling around on time-consuming bits and lots of head scratching. Getting there slowly!
-
5
-
1
-
-
Project 387
in 987
5 hours ago, BBB said:Will you have to go down the IVA route rather than a normal MOT, as you have modified the bodywork, lights etc? Or is it still sufficiently “boxster” to avoid the extra testing? i.e. is it classified as a kit car now?
Iconic produced the kit to still be sufficiently Boxster - i.e. only body panels are cut and not chassis rails etc. It's close, (very close) but still within tolerance apparently.
I'll soon find out when it goes for MOT I guess 🤣
-
1
-
-
Project 387
in 987
5 hours ago, Menoporsche said:Great post. 6 different photos, 4 different colours
It really does vary quite a bit!
3 hours ago, JonSta said:Are you sure those headlamp stoneguards are legal? - way cool though - vintage racer look.
I was up until now 🤣🤣
I've done some googling with mixed reviews - seems that they can't reduce the light by more than 15%, which they might to be honest... I'll check with the MOT place when I get to that stage (I also fully expect it to fail the first time due to some grey areas, so the first test for me will be for clarity) Fortunately they only hook on at the top then secure with the bottom bolt.
1 hour ago, Terryg said:I admire not just the quality of the work but the patience in taking the photos and writing up what you did.
Thank you - I've enjoyed documenting for my own benefit, so the fact others are interested in the project is great! 👍
-
Project 387
in 987
A small weekend update... With it being Easter and kids/family commitments I couldn't get more than during the dat on Friday on it, so only managed to get a start on lots of bits and pieces.
Fitted the grill and indicator, with the headlight just balanced in place until I work out how they can be fixed. Badge glued onto the bonnet handle and again just held in with friction until the nuts turn up today (missing from the original delivery)

Masking up to drill (so it doesn't risk cracking/slipping) and lots of measuring/templates to ensure I don't put a hole in the wrong place! I found I lost a load of time here, which is frustrating as I never get as much done as I wanted to. The two holes are for the driving lamps - one with a captive nut for the bracket, the other for the wiring (with a metal pipe insert to neaten it up!) I also messed around for a while trying to make a nice solution for the exposed wiring for the lamps.

Fibre glass battery cover - needs a hole drilling for the washer filler, then trimming with the leather. There's also a smaller cover for the wiper mechanism. Under the bonnet will be trimmed with the same leather (dependent on my upholsterer skills...)

As mentioned before I needed to spin the bonnet latch through 180 degrees, so this needs a new handle fabricating and slot cutting through the front to open the second stage. Also need to work out the motor location/set up for the first stage

This took ages to sort! Once the rear rubber seal was on I had to sort the latch out - the one supplied wasn't high enough so had to fabricate a new once out of some box section I luckily had from another project. You won't see it once the boot liner is back in, but I'll still paint it black just in case. I also need to tweak one of the hinge holes to bring this gap on the left much tighter - shouldn't take too much. You can also see the (dusty) brake lights in and a nice shiny grill placed in to check the fit (original 356). I'll drill a couple of drain holes and use the pipe inserts to finish

Started to mess around with the tonneau covers - I had cut one before it went off for paint, and fits quite well. I hadn't realised originally that the plastic grill from the roll hoop needed to pop out, once did that it went in much nicer. Middle section needs cutting back a bit, then these three panels will be trimmed in leather. You can also see a strip of flat black leatherette I was working with to cover a small 15mm exposed area of fibre glass under the windscreen - it's a real fiddle to get right, but I think if I don't cover it, it will bug me forever

That's about it for this weekend unfortunately - need to nip out today to collect the door cards, front valance, humps etc from the painters that I left there last week.
Have a good week 👍
-
4
-
-
Project 387
in 987
On 4/7/2023 at 10:04 AM, maybe said:Looks even better in the light of day. Can't wait to see it with wheels and the humps.
Incidentally, I was wondering what wheels you have gone for? Sorry if this has been mentioned, but I don't remember seeing it. I was also intrigued by the fitting of the Speedster Humps. As you can only have them on with the roof down, I presume they are fairly easy to off and on?
Thank you, it's amazing the difference it looks in different light.
The wheels will be very similar to this - I'm debating about getting the centres powder coated in gold to match the badges, it might look a bit bling though

The humps hold down the three piece tonneau covers and have a push stud release on one end, the other clips under the roll bar. The five pieces then fit in the frunk so you can still get the roof up ok as per the original car - the total process is unfortunately a bit more of a faff than unclipping the latch and holding a button, but I think the humps make the look!
-
Project 387
in 987
Guess what got delivered this morning


With a jump start it bounced into life straight away, however the battery is completely dead without running so needed to push it into the garage as it was about to start pouring down with rain!
There's no rubber on the boots lids yet, so they'll fit better once on.
I've got to get some stuff done for work today, then hoping to get some time on it this evening and most of tomorrow 👍
Speedster humps are almost done, as is the number plate light holder and front valance - I'll pick these up soon, but I've got plenty to be getting on with!
-
7
-
-
Project 387
in 987
On 4/1/2023 at 12:00 AM, iborguk said:Interior...
That looks 😎
Certainly a nice match with the exterior. One of cars Iconic have just finished (a 3.4 987 I think) had a wooden steering wheel - on the photos it looked pretty good, but I think a lot of the interior would need changing to make it look less modern. Unfortunately I didn't see it in the flesh!
-
Project 387
in 987
On 3/31/2023 at 11:08 AM, Mattman42 said:THAT LOOKS BLOODY GORGEOUS!!!!
Congrats @timbobalobox - great choice and the painters look like they've done a stunning job too - for me the right mix of vintage and modern for the car
I will claim victory on the colour option as i'm pretty sure i was closest with the offerings made earlier in the thread
@Menoporsche's interior idea is great - break up the black to avoid it becoming too dark and losing the details. You could also add some matching green carpet with black overmats, again just to break it up a bit and bring in a suggestion of the exterior colour without being too much.
What's the next milestone you have?
Thank you
Once it's all back together I'll have play around with some interior ideas - if I could get some matching trims or get some of sprayed would be good.
MOT is probably the biggest milestone, then I can get out for a drive again! I'm hoping the weight of the body hasn't had too much of an effect on the performance.
The parts I'm most unsure of at the moment are fitting/covering the tonneau and speedster humps, and working out how to stop the error on the automatic headlight adjusters (which are obviously no longer there!). I've bought some resistors which should do the trick 🤞


Project 387
in 987
Posted
Black wrap is a decent shout!
Or two massive baked bean tin exhausts