


Ringmaster999
-
Posts
499 -
Joined
-
Last visited
Content Type
Profiles
Forums
Events
Store
Posts posted by Ringmaster999
-
-
7 hours ago, BoxsterLL11 said:
Just been reading through this thread as my roof has been playing up on my 2012 981 for nearly a year now and getting worse.
Problem seems to be the hook is not retracting before it gets to the fully open position and stops the roof from going any further.
I watched several of Jeff Richardson's video's and done the testing he advised.
The output from my SIGNAL 1 is delayed by 4-5 seconds.
Am just about to remove the roof from the car.
I think Jeff's video about the microswitches are a little misleading as he seems to imply there are 2 switches on the left hand side (signal 1 and signal 2)
I think it is actually one microswitch doing both jobs.
Old part number was 981 561 94301
But now superceeded by 981 561 94302
Keep us posted on your progress. As I mentioned above mine is now resolved thankfully. But it was a bit of a pain at the time trying to get it sorted. Good luck 🤞
-
3 hours ago, ljcarr said:
Ok just heard back from Porsche Chester, PSE is on back order due in between now and June!
cost fitted £3,250 😳Wow that’s gone up. I had it retro fitted back in Oct 2020 at a cost of £2118. I had the Sport tips so they weren’t included. But that’s a50% increase 😳
-
32 minutes ago, Lonewolfgjp said:
originally thought I would just buy new if I changed my mind but that was until I saw the price 😂
Go on @Lonewolfgjphow much
-
10yr Minor service with spark plug change and brought the MOT back in line (due in July because of CV19 grace). All ready for the warmer weather 😎👍
-
51 minutes ago, Raffe said:
Totally agree, the lowered stance gives the car a much sportier look and seems to enhance the lines too.
6 hours ago, daz05 said:If I were to begin my 981 journey again with everything I know now, I think the priority would be the ride height, the car with whichever, bumper, splitter, diffuser, lights just looks so much better with the x73 setting at -20mm. I'm sure I would have ended up doing it all anyway but that's got to be the biggest bang for your buck at the expense of some of the low speed ride quality of course.
I'm hoping to get my front light inners from the old lights I've been refurbing from the painter today, looking forward to seeing how they will look rebuilt and on the car.
Not long after buying mine I had PSE and the x73 retro fitted. PSE worth it for smiles per mile and the x73 just really transformed the car. Big money but no regrets.
Front 911 splitter with Emc2 fitting kit in picture lost when entering an underground car park 😳😂 It was a steep downward ramp into the car park mind 😂😳

-
37 minutes ago, ljcarr said:
Excellent thanks, I’ll take a look
Not sure what your car is running regards suspension but mine has x73 which lowers the car by 20mm over standard. I had the 911 front splitter with the Emc2 fitting kit but ground clearance becomes a bit of an issue. I managed to rip it off entertaining an underground car park of a hotel in Belgium. So unfortunately took it off. It looked ok though when fitted.
-
 1
1
-
-
1 hour ago, andygo said:
Got my roll of 1.5mm thick x 12mm V Happy Birthday ! tape. Think there should be enough..

Yep think you just might have enough 😳😂👍
-
@andygo I understand exactly where you are coming from. I was not happy either with the amount of contact between 3M VHB and the bodywork. My solution was to remove the actual side skirt panels and secure with self tapping screws. Reversible but obviously you’d need to buy new black plastic surrounds as you’ve drilled through them using my method. I also used this method as I wanted to check the drain holes and remove the one way valves.
-
 1
1
-
-
On 2/16/2023 at 8:27 PM, daz05 said:
an interesting name for a soft top expert.
No expert just my opinion. Not sure where your coming from?
-
19 hours ago, Bolts said:
Interesting read. Did the replacement micro switches fix the problem permanently? That sort of repair is way beyond me so might talk to my local indie (nine excellence) to see if they can do or have done the repair in the past
Yep it sure did. As the thread mentioned they tried the micro switch above the window first but that didn’t solve the issue.
19 hours ago, Bolts said:Do you know what the cost of this repair was?
Yes it was a heavy bill considering the actual price for the two micro switches that cost IIRC just over a hundred quid. Total bill will depend massively on your chosen repair shops hourly rate. I paid just north of £800
-
 1
1
-
-
12 hours ago, GTSMarky said:
Have a search on here as there are known issues with the roof switches.
Search my posts to see my experience with a 981 roof problem. I think it could be a bit more problematic as these cars get older.
-
1 hour ago, alank said:
can you insure a car for track use
Some specialists do. For example Lockton if your a PCGB member of an insurance policy that includes track say cover on PCGB organised track days.
-
10 minutes ago, iborguk said:
It's still plastic
") , just ali look or silver paint as we like to call it.
, just ali look or silver paint as we like to call it.
718 has a little hole on the fuel flap which you can dock the cap whilst fuelling.
981 also has said docking hole 😎👍
-
1
-
-
33 minutes ago, Withy said:
At long last I actually got one of these from OPC (Glasgow) - for the princely sum of £3.95!
It's actually a bugger to replace as it's a ring around the filler cap and new one seems maybe 2mm smaller in diameter. Comes with a nice warning from Porsche that it can only be fitter by "An Authorised Porsche Partner".

Anyway, I removed the cap well away from car, cleaned and dried it thoroughly, and used a heat gun to stretch the new tether and persuaded it on. I tell you it is a bit odd to be using a heat gun on anything that has been near fuel!
All back on and sorted now. I do find it strange that this plastic thing (It's not actually aluminium, just aluminium look) makes a difference, but it does!

Hopefully get some decent weather soon so that I can clean the car (a new array of products on the way thanks to some random Instagram ad from EZ Car care!)
Very hot water does the same and is probably a bit safer 😂👍 Just leave the rubber in hot water for a bit and jobs a good un 👍
-
1
-
-
10 hours ago, zagamuffin said:
110 quid on eBay and 350 on Amazon , grp version and using same pic , grab an eBay bargain while ya can
Yep it does pay to shop around. I was thinking of doing this for a couple of years but was put off by price and the actual fitting of them. I wanted to make sure they never got ripped off. But then found the ones for just over £100 on ebay so went for them. You won’t find better IMHO
-
1
-
-
4 minutes ago, Simo_UK said:
With a white car I can understand you’d likely see any partial PPF.
That said, if a whole panel is done you’d not see it at all.
I have the side sills/intakes covered and looks fine. There is a small partial piece at the rear of the wheel arch. I’m pretty OCD too and forget it’s there.
Take a look at the pre cut kits here to see what we’re talking about (the rocker kit)
Worth it in my opinion. The road rash on my previous Boxster wasn’t a good look.
My point exactly
-
1
-
-
1 hour ago, ljcarr said:
Thanks for the reply is guys, I know PPF is probably the way to go but I had it on another car I didn’t like it. It was too visible to me being a bit OCD. I kept seeing the very edge of it in different lights, and when it was dirty, and thinking the car was scratched.
I think a lot has got to do with the skill of the installer. Like anything really skill is important but often unfortunately price is sometimes an influence when we look at things like Ceramic Coatings, PPF etc. Of course I’m not saying @ljcarr this is the case with your previous experience if indeed you had the PPF fitted. But in my opinion done by really skilled applicators you shouldn’t see edges in PPF on major body panels.
-
2
-
-
1 hour ago, Lonewolfgjp said:
Yep plus 1. Good quality and quick delivery
-
1
-
-
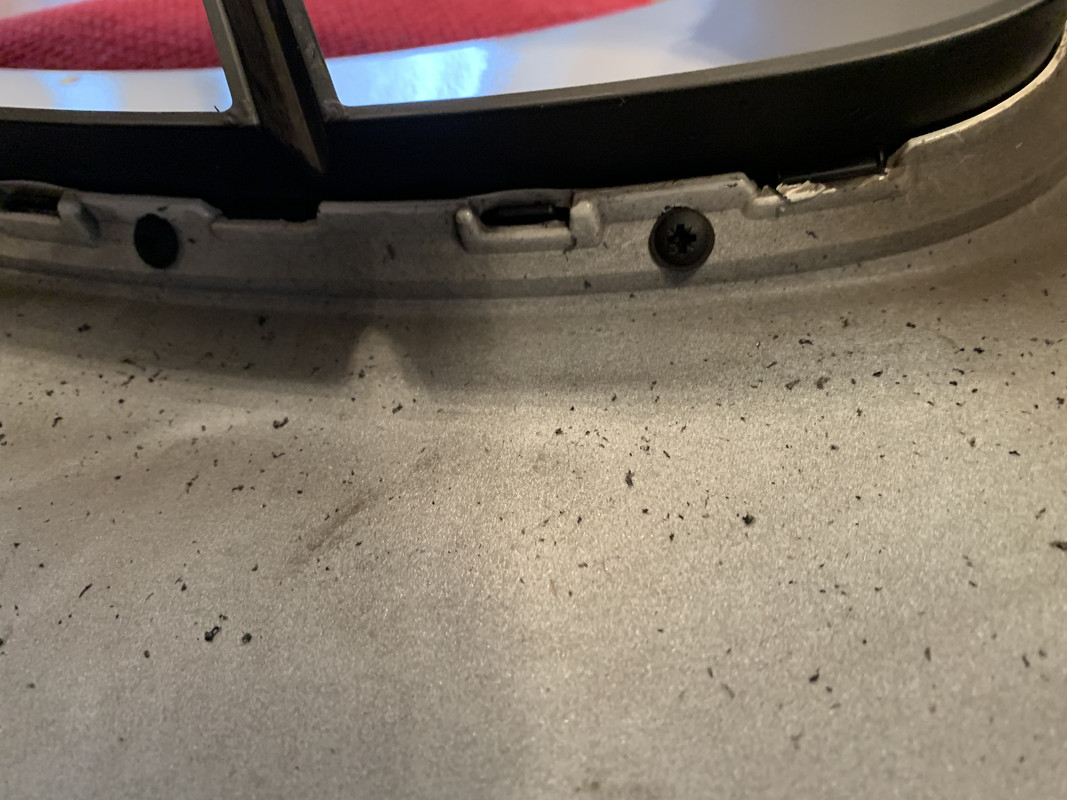
1 minute ago, Patt said:
I took the whole assy out of the drain plug.
Getting the side skirts off is easy.
Getting them on single handed is more of a challenge as you need to fit front first at about 45 deg and then get them into place - lot of floppy plastic to try and hold of the floor on your own.
Ohh and be careful with the 90 deg turn plastic clips on the underneath - they are £13 ea ! and I am missing 6 of them.
Had the youngest helping so I wasn’t alone. He had the front covered whilst I removed the back and visa versa. I managed to get away unscathed. Passengers side next 🤞😂😂
-
29 minutes ago, moospeed said:
Was it much work taking off the side panels? I've seen a "How to" on Youtube, but of course - everything is easy on youtube. Wondered what real life was like...
No not at all. I had my boy with me to be at the front when it came to the actual removal so that it didn’t fall. But honestly we took our time and it went sweet no problems. @Guvs gives good advice in the Technical Questions threads about applying WD40 at the front. I also applied it to the four black plastic tabs under the door sill plastics that you remove. Give it a go it’ll be fine 👍
-
1
-
1
-
-
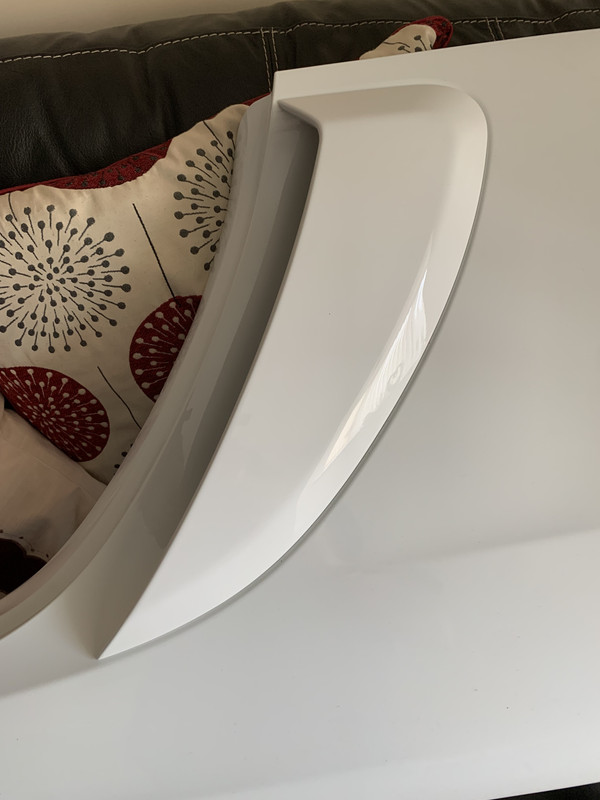
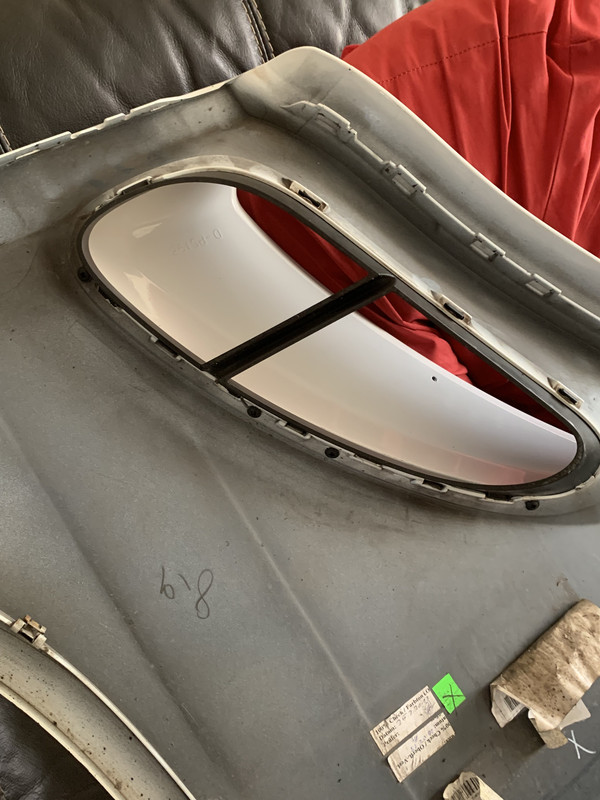
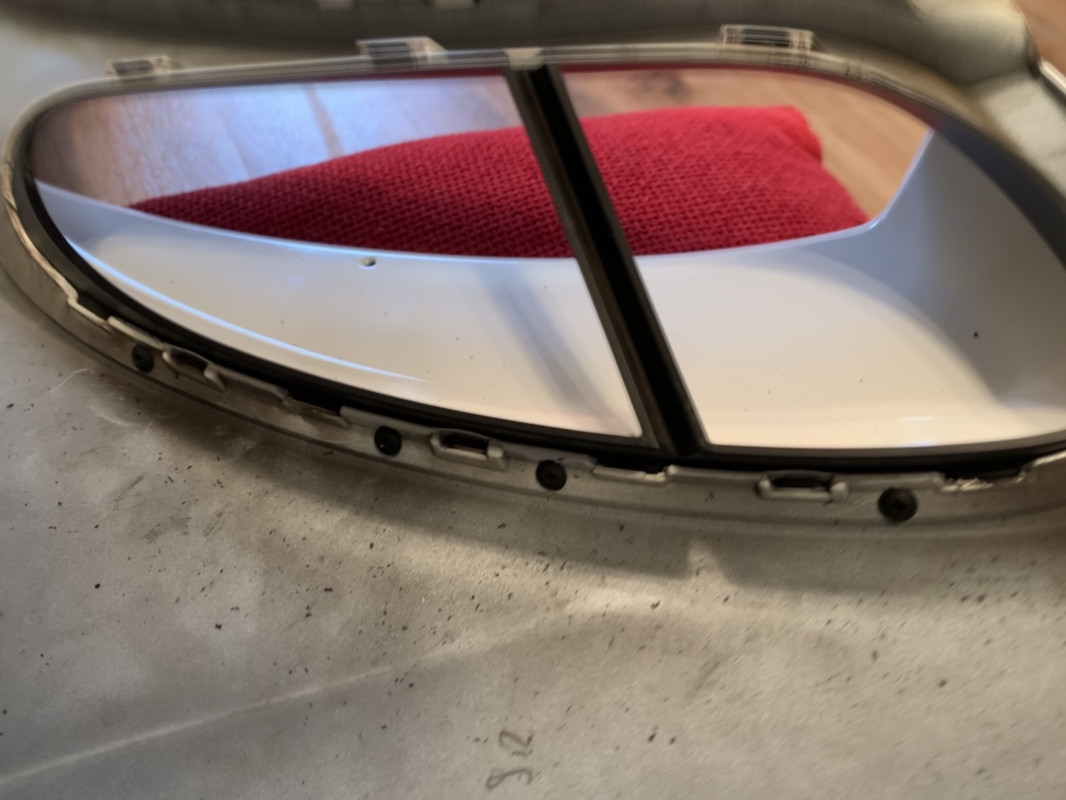
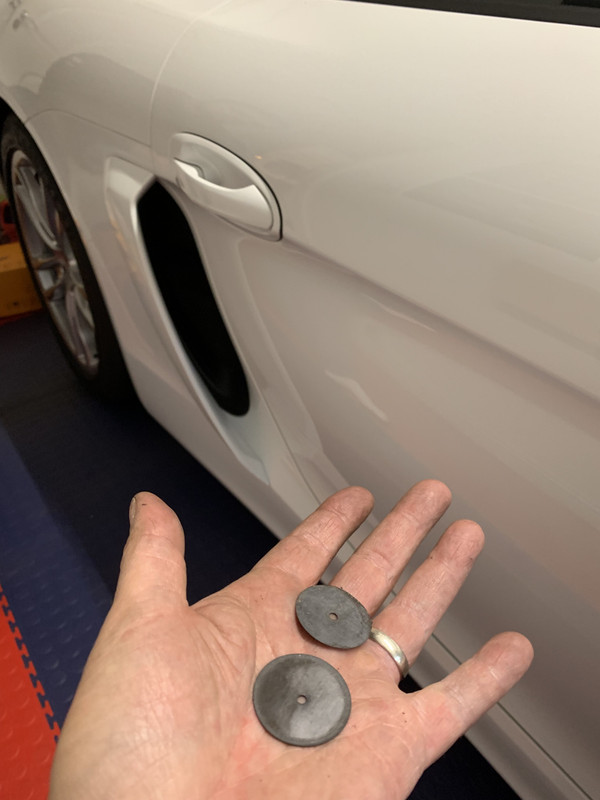
So as mentioned in a previous reply I intended to have a go at removing the side panels this week to check the drain holes as per the vid and attach the GT style side scoops in a different way others have used. As you would expect on a car that has been garaged all its life and used as a toy. Play clean and put away 😂😂 they weren’t blocked. I removed the one way valves as I can’t see any advantages in keeping them and I’ll sleep easier now knowing along with my routine of pouring water down to make sure there clear there’s no way they should ever get blocked.
Anyway attaching the GT side scoops I used 3M VHB tape first. Then drilled pilot holes, four in total, from the rear of the panel through the black plastic surround and into the side scoop. I then used four self tappers to secure. Now it is reversible but obviously the side panels would have to be removed to unscrew the screws before removing them and replacing the plastic surround as you would if you used the other method. I’m pleased and pretty confident they won’t fly off.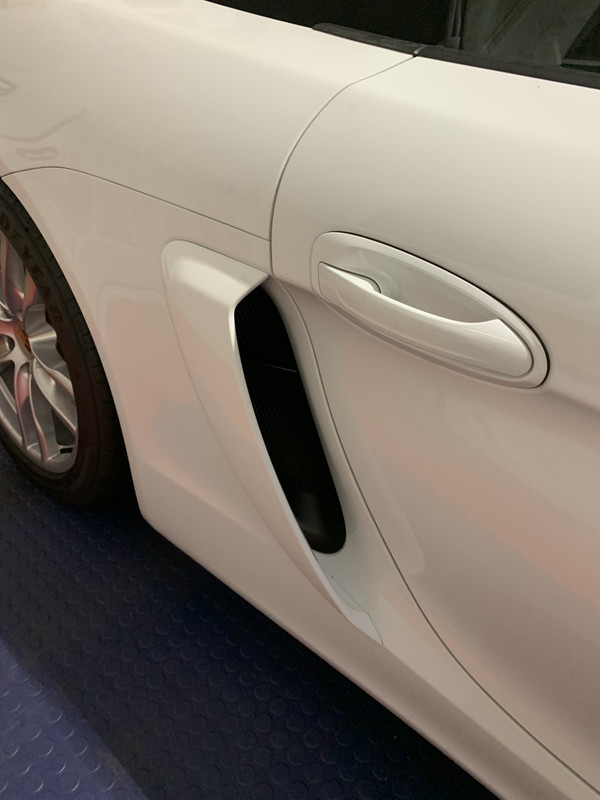
-
2
-
1
-
-
57 minutes ago, michelin said:
I think others have used 3M VHB tape but I’d be conscious of them coming away when flying about The Ring 🤣
I’m very conscious of them flying off and have yet to fit mine. They’re all ready to go but this week I’m tempted to take off the side panels and remove the one way valves on the drains that appear to cause more issues than they solve. Even though I’ve never had any issues probably because it’s garaged and not driven in winter. Anyway once off I’m thinking of drilling into the side vent covers and using self tapping screws from the inside of the side panels. I know some have attached via self tapping screws and the vent covers and then reattach the covers along with a bit of 3m VHB tape. If I do use the panel off method it’s still reversible but would require the side panels to be removed first. As apposed to just the vent covers. We’ll see 🤔😂
-
16 hours ago, andygo said:
Finally got my side scoops fitted:
@andygowhat method did you use to attach the scoops?
-
I recently had roof issues. Here’s my experience


981 Roof Issues
in 981
Posted
Oh yea cost me £830 ish and they really looked after me with the price as it was the first they’d done. So if you can fix it for just the micro switch price, even though as you mentioned that’s overpriced, you’ll have a great result 👍